How to Bulk Upload Images into Business Central


If you need to load images for several items in Business Central, you can import images for multiple items simultaneously. To do this, name your image files according to the corresponding item numbers. Then, compress these files into a ZIP archive. Finally, use the “Import Item Pictures” page to manage and import the images for your items. Let’s review this process step-by-step!
Step 1: Gather the images that need to be imported. Verify that each image’s filename matches the corresponding “Item No.” in Microsoft Dynamics 3655 Business Central.
Step 2: Compress the images to import into a compressed ZIP archive.
Step 3: Open Business Central and enter “Import Item Pictures” in the “Tell Me” search dialog:
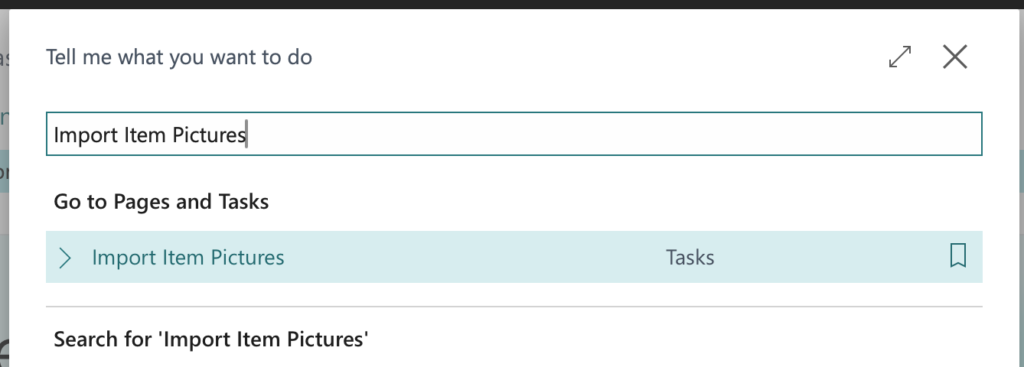
Step 4: Choose the “Import Item Pictures” task page.
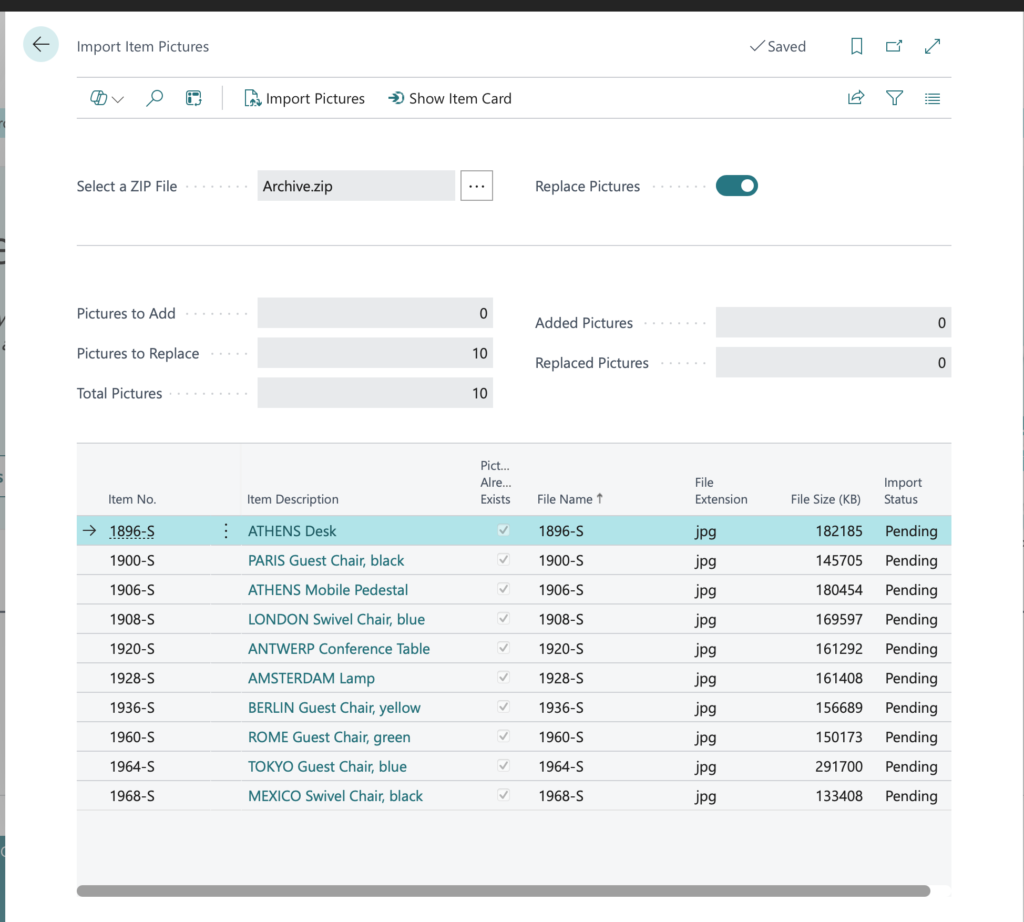
Step 5: Using the ellipses in the “Select a ZIP File” field, select the compressed ZIP file containing the images that need to be imported:
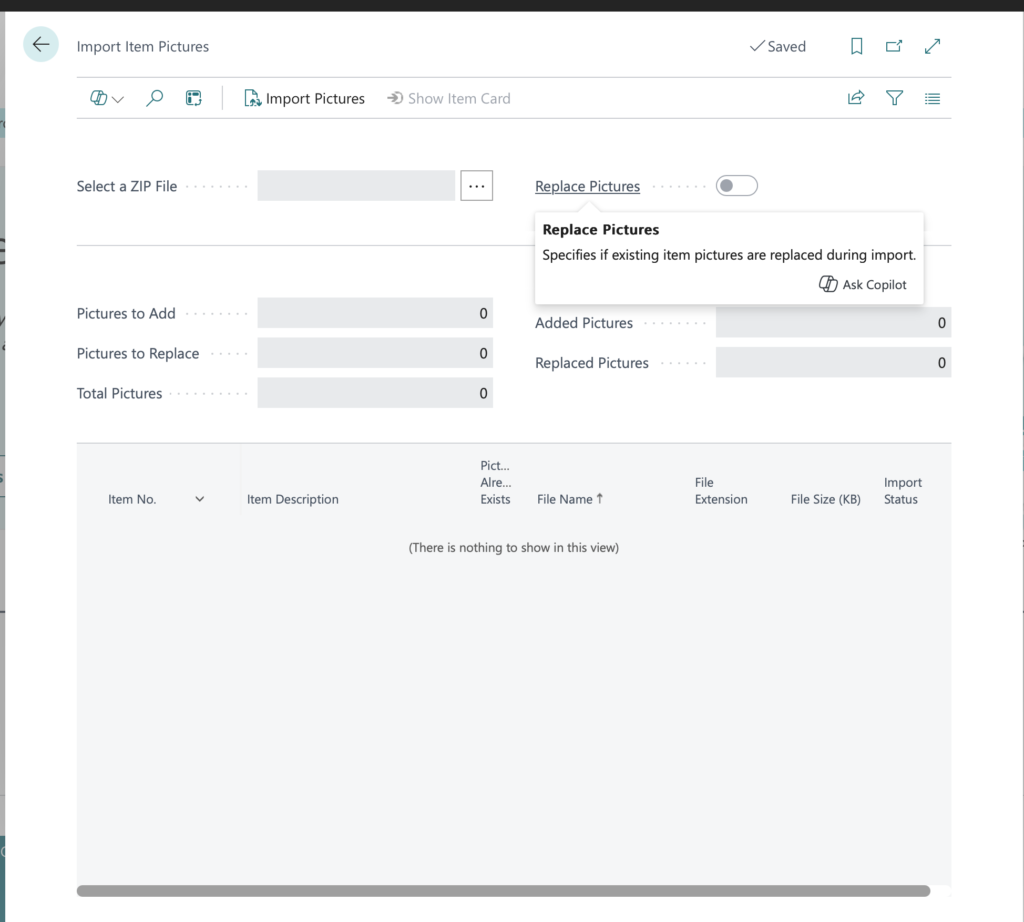
Step 6: For each image and item in the file, a line is created that includes the status of each image. The “Picture Already Exists” checkbox is selected for items with an associated picture. Additionally, you can enable the “Replace Pictures” option on the “Import Item Pictures” page to replace all existing pictures with those in the file. If you prefer not to replace existing images, select the “Replace Pictures” checkbox.
Step 7: Choose the “Import Pictures” action.
Now, let’s see it in action: