How To Update Item Tracking Codes After Ledger Entries Have Been Posted



One of the greatest features of Business Central is its inventory management module. However, there are some nuances users need to be aware of when using this module. Business Central does an amazing job of tracking inventory and costs. But once transactions have been posted to an item, many settings become unavailable for change. Let’s look at how to adjust Item Tracking Settings (lot number/serial number) after transactions have been posted to an item.
Background
Before we take a deep dive into this topic, it’s important to understand why you would need to do this. As an end user, I found that many of our items were originally set up without the admins understanding which settings they were configuring. Many people do not realize that once item tracking is configured, you can’t make many changes to it.
In our instance, we had many items that were both lot- and serial-tracked but did not necessarily need to be. Using one or the other, or none, would have been sufficient — and we’re an FDA-regulated company. However, Business Central doesn’t let you make these changes easily.
Making Changes
Business Central handles the lot and serial number changes in a unique way. To start, before you can make any changes, you must ensure the inventory level is brought down to zero. This can be done by utilizing an item journal to bring your inventory for that item down to zero.
Any changes you make can only be “uphill driven”:
- You can enable lot-tracking from an item that was never lot-tracked before
- You can go from lot-tracking to serial tracking
- You can’t go from serial tracking to just lot tracking
- You can’t go from lot tracking to no tracking
- You can’t enable warehouse lot/serial tracking if it wasn’t configured from the start
Again, before these changes can be made, the inventory needs to be at zero across all locations.
The Scenario
Let’s say that you have an item that needs to have the item tracking changed on it after some ledger entries have been posted against it. You have two options: create a new item or perform this workaround.
If you create a new item, you lose all history. While the information is still in the system, it’s not associated with the new item. In some cases, this is acceptable; other times, it is not. It just depends on the industry.
If you utilize this workaround, you still maintain the history, but depending on the costing method, when you put the inventory back into the system, you might lose the cost history against the exact lot and serial numbers. This can be avoided, but it becomes very tedious to get right, as you will need a unique line for each Serial Number/Lot Number.
The Workaround
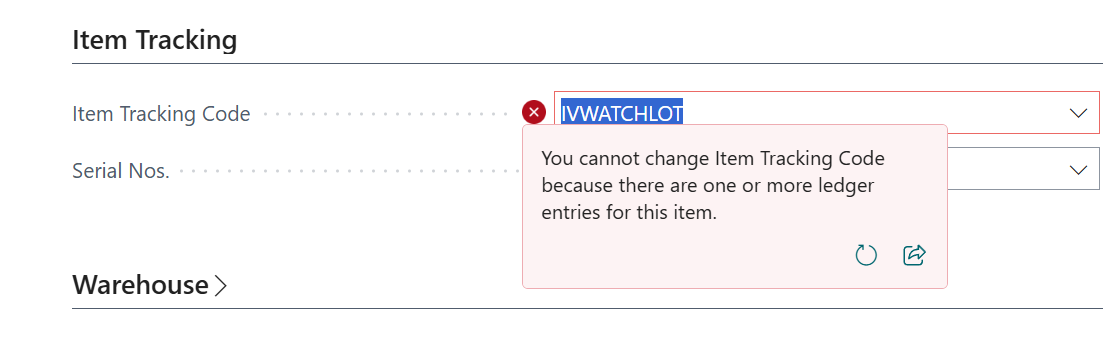
This workaround will only allow you to increase item tracking, but not remove it. If you try and change the tracking code without bringing the inventory down to zero, you will get this message:
Once you have performed an item journal to bring the inventory down to zero, navigate to the item card, and scroll down to the “Item Tracking” section:
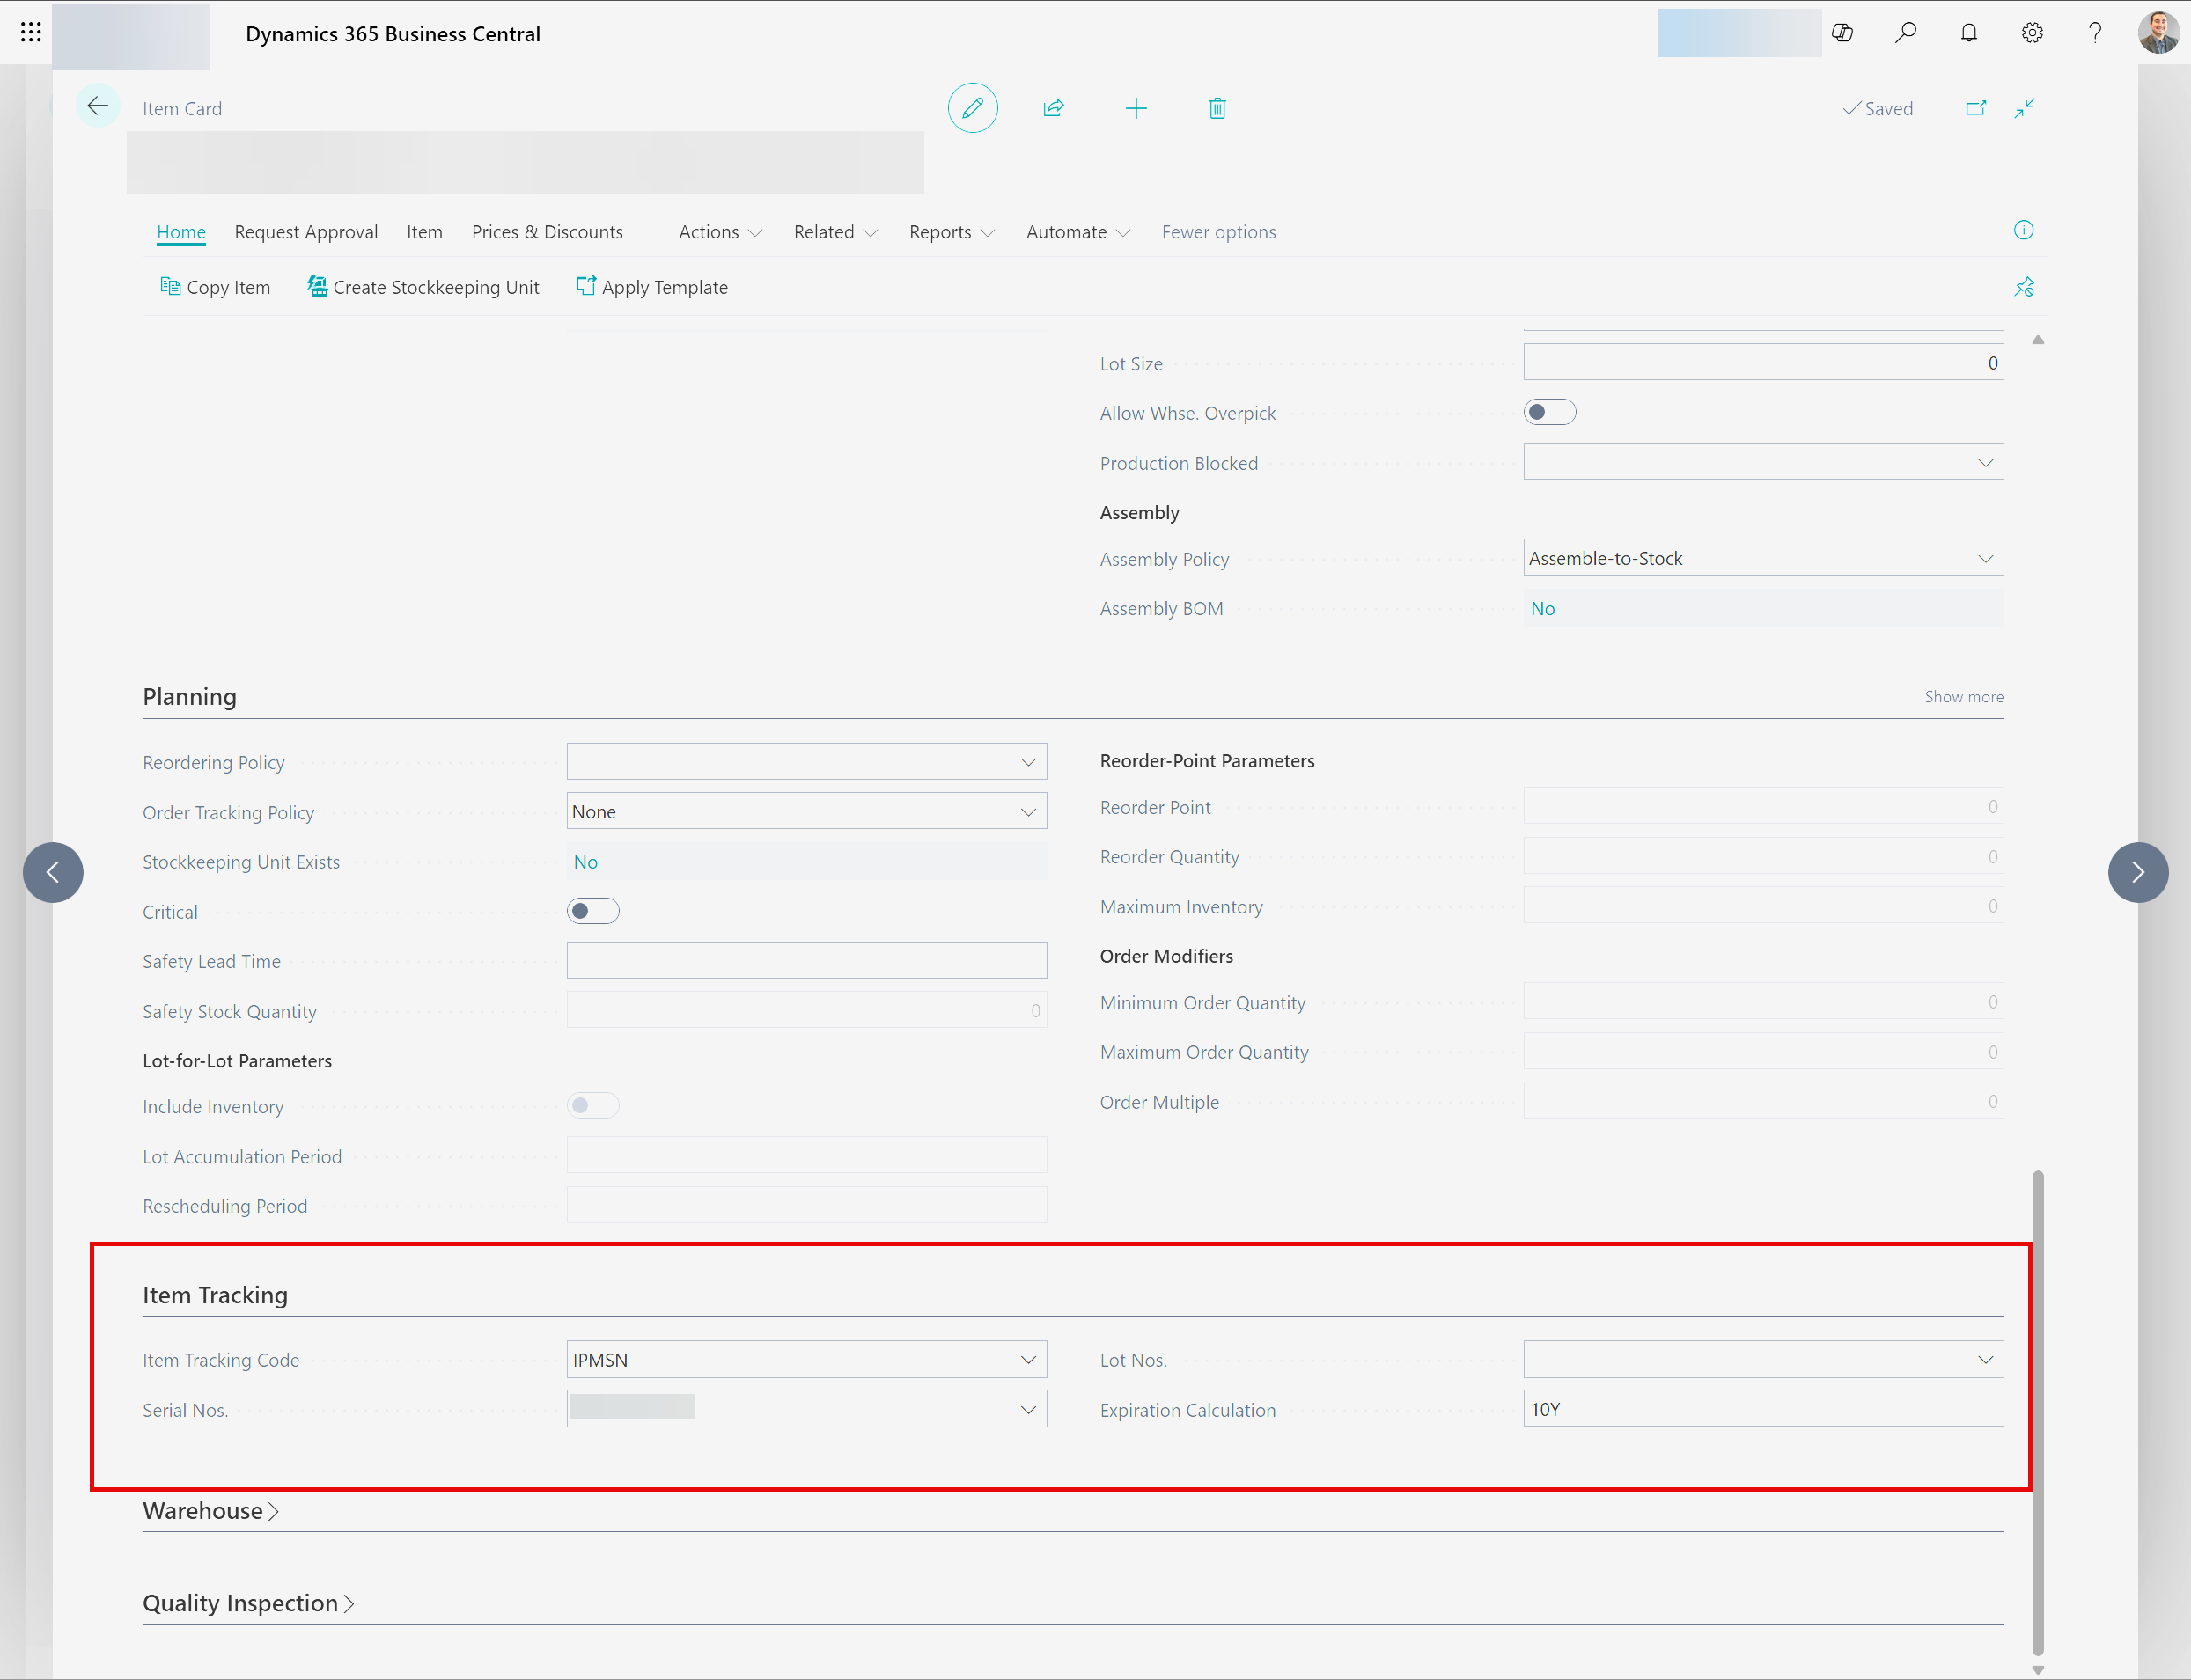
Verify that the “Item Tracking Code” settings are proper, and select the correct code:
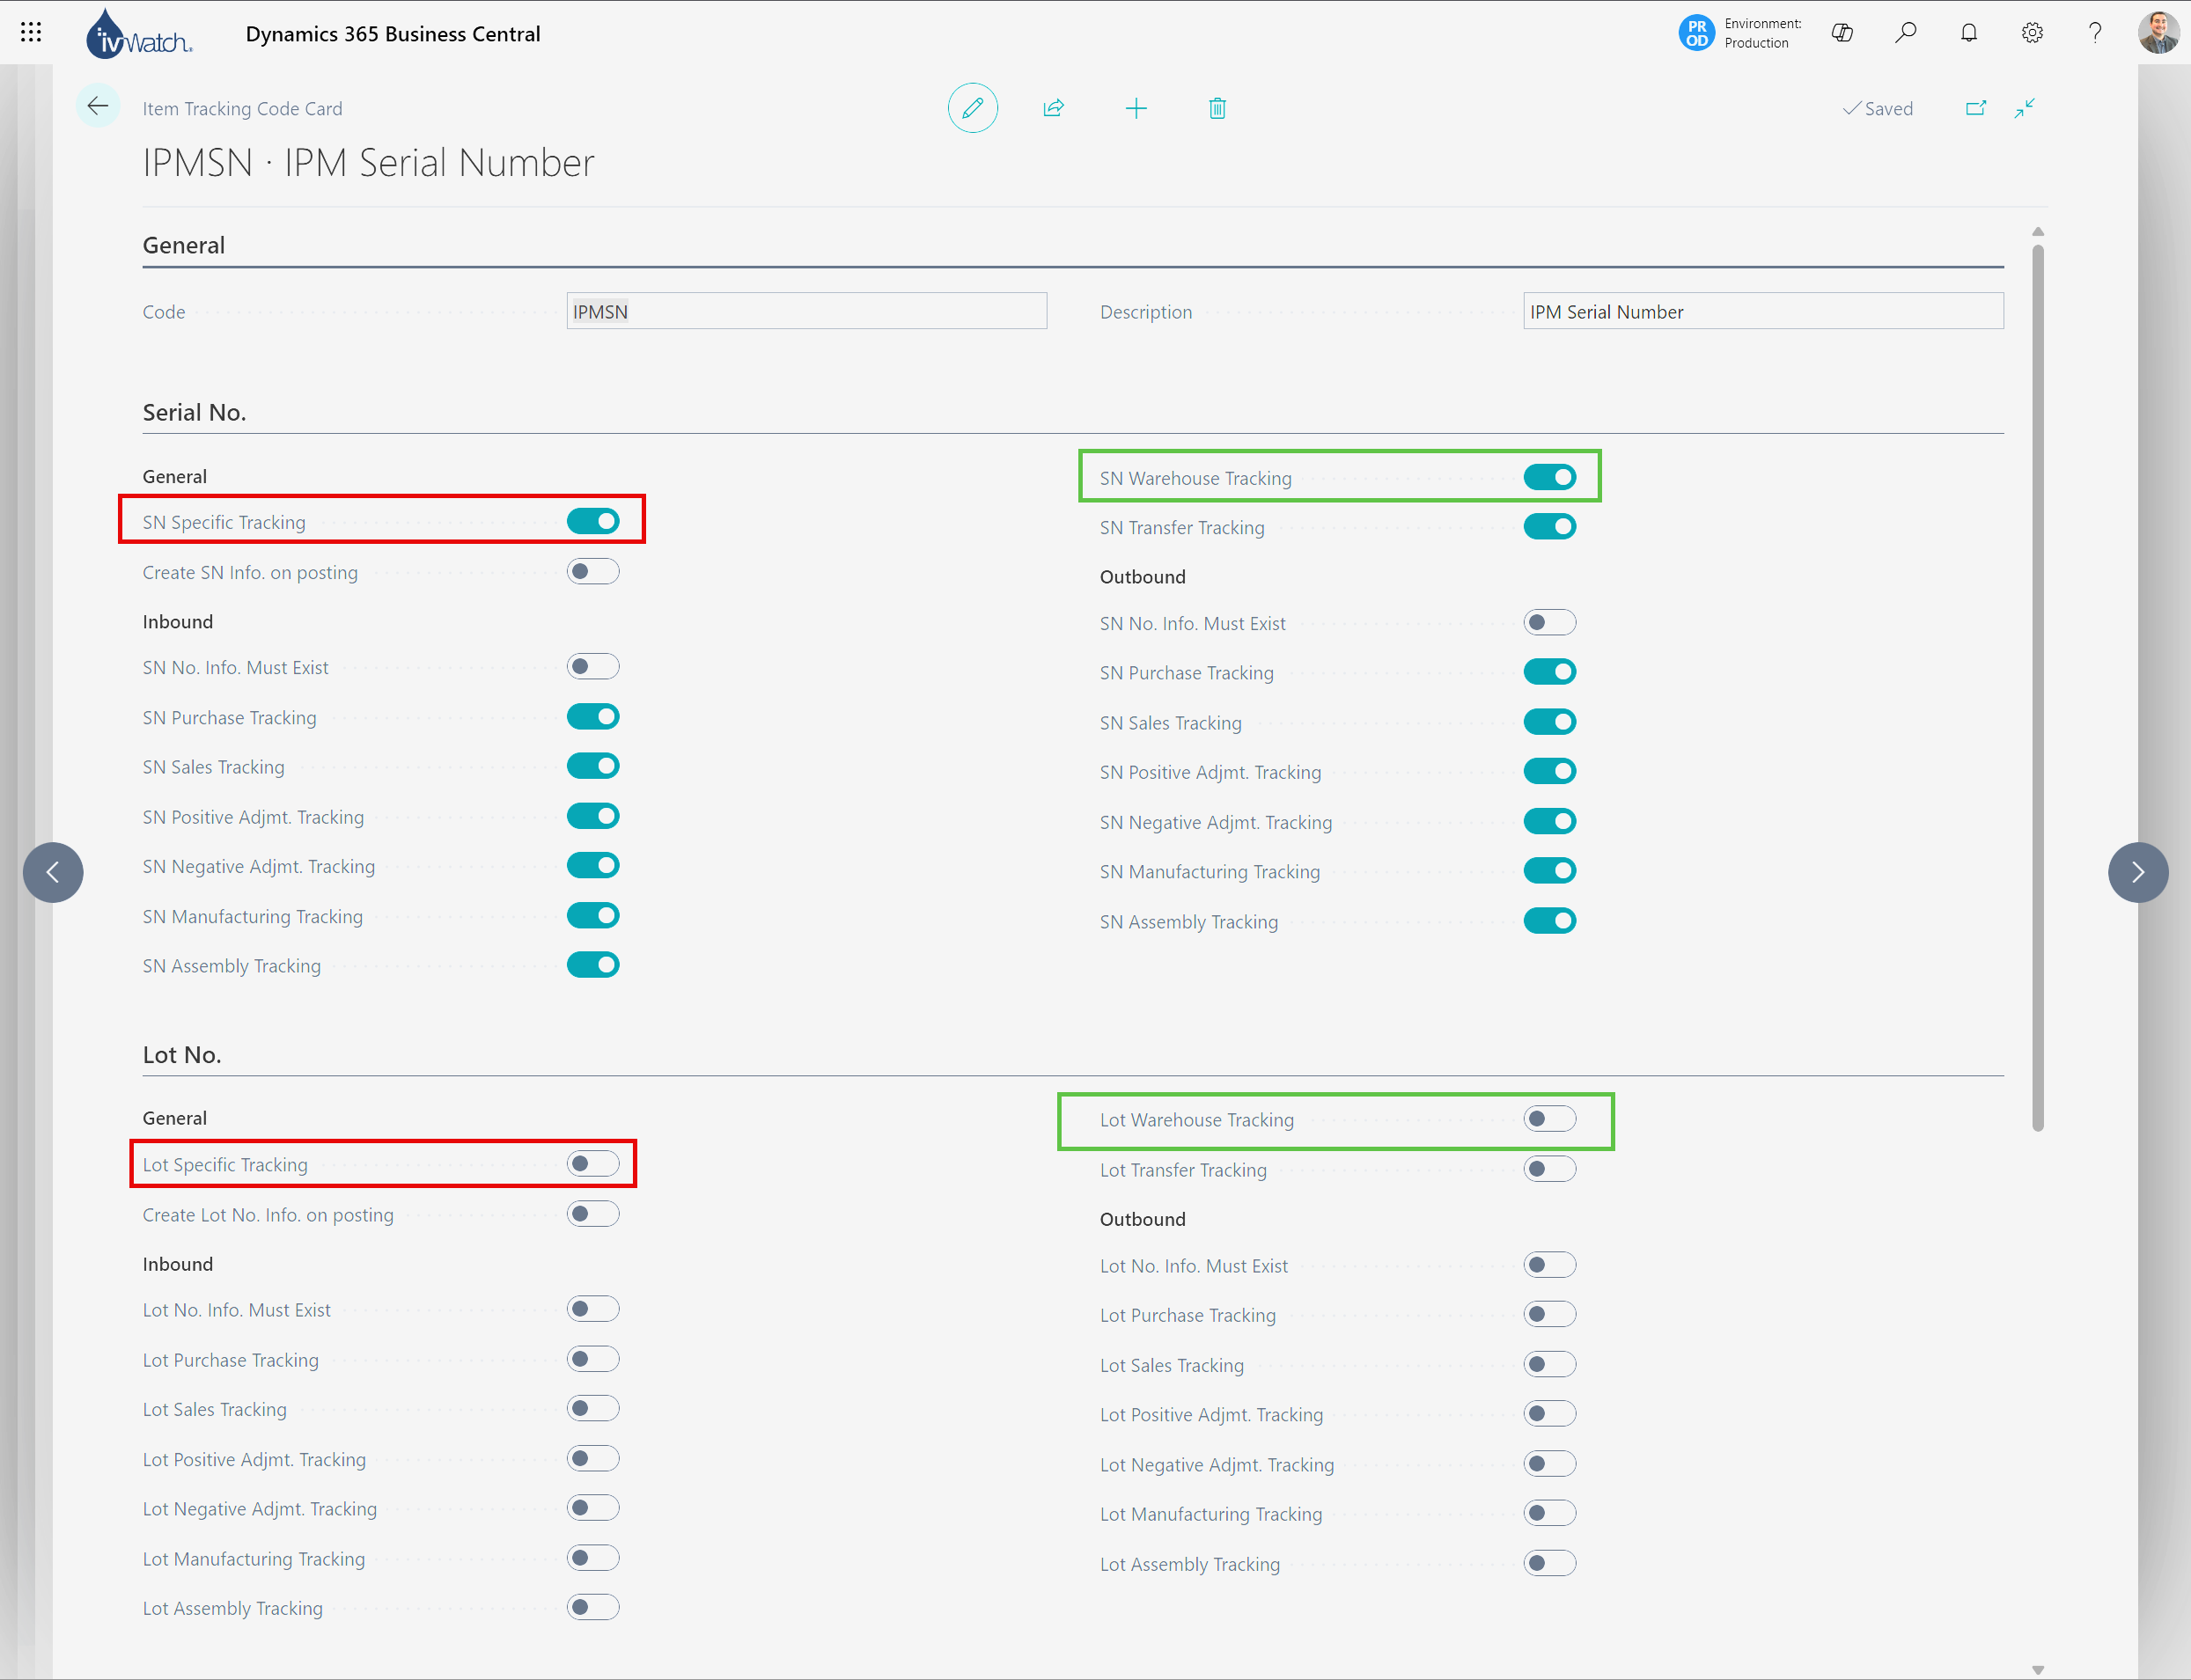
The screenshot above shows the primary tracking in red, while the green boxes indicate warehouse tracking. I always prefer to enable warehouse tracking now, in case you need it later, as it’s more difficult to enable it later on; but this depends on business guidelines.
Once the tracking has changed, you can now perform an Item Journal to put inventory back into the system. Keep in mind that when performing the item journal, ensure the cost going back into the system matches the cost that went out when performing the negative item journal.