How to Create a Sales Order in Business Central



In Business Central, a Sales Order is used when you are selling goods or services to a customer and need to reserve inventory, ship items, and/or invoice the customer. This post will review how to create a sales order in Dynamics 365 Business Central.
1. Open the Sales Orders Page
- Select the search (🔍) icon, type Sales Orders.
- Select Sales Orders from the list.
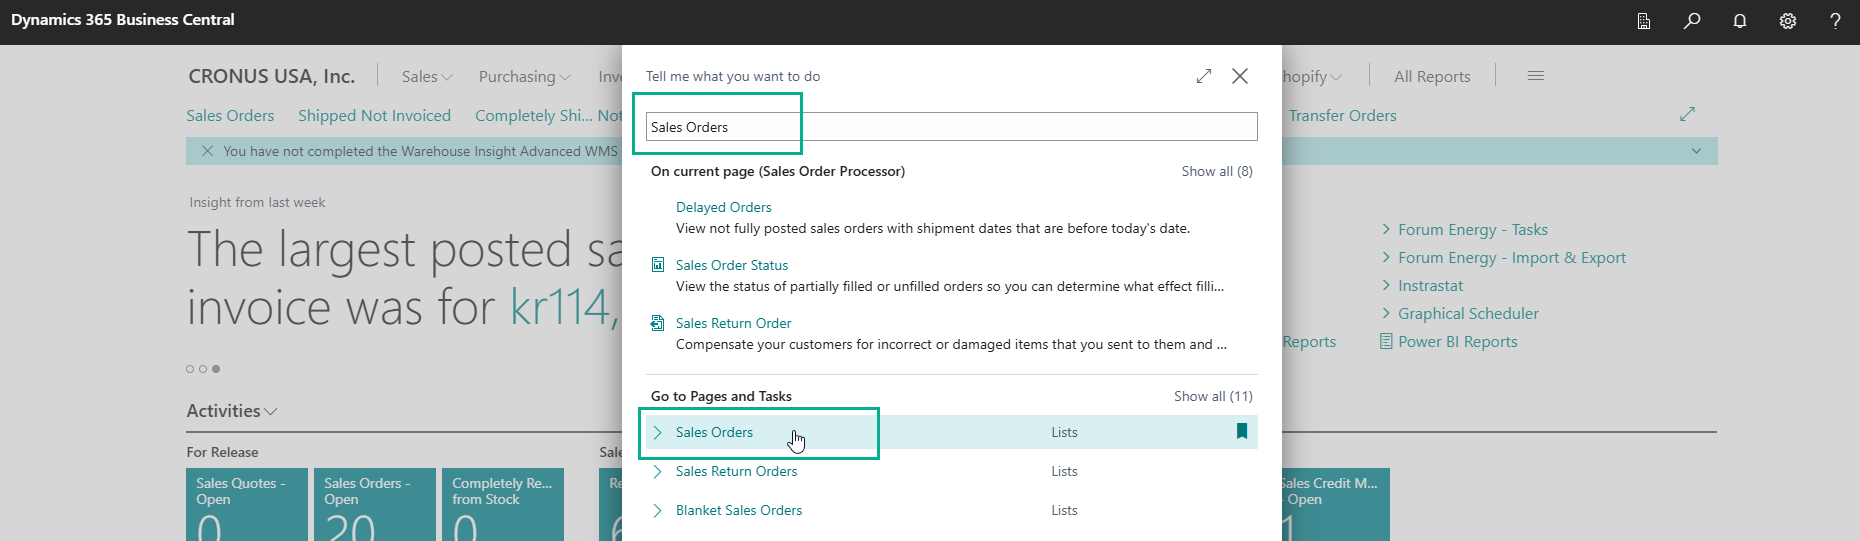
- Click New to create a new sales order.
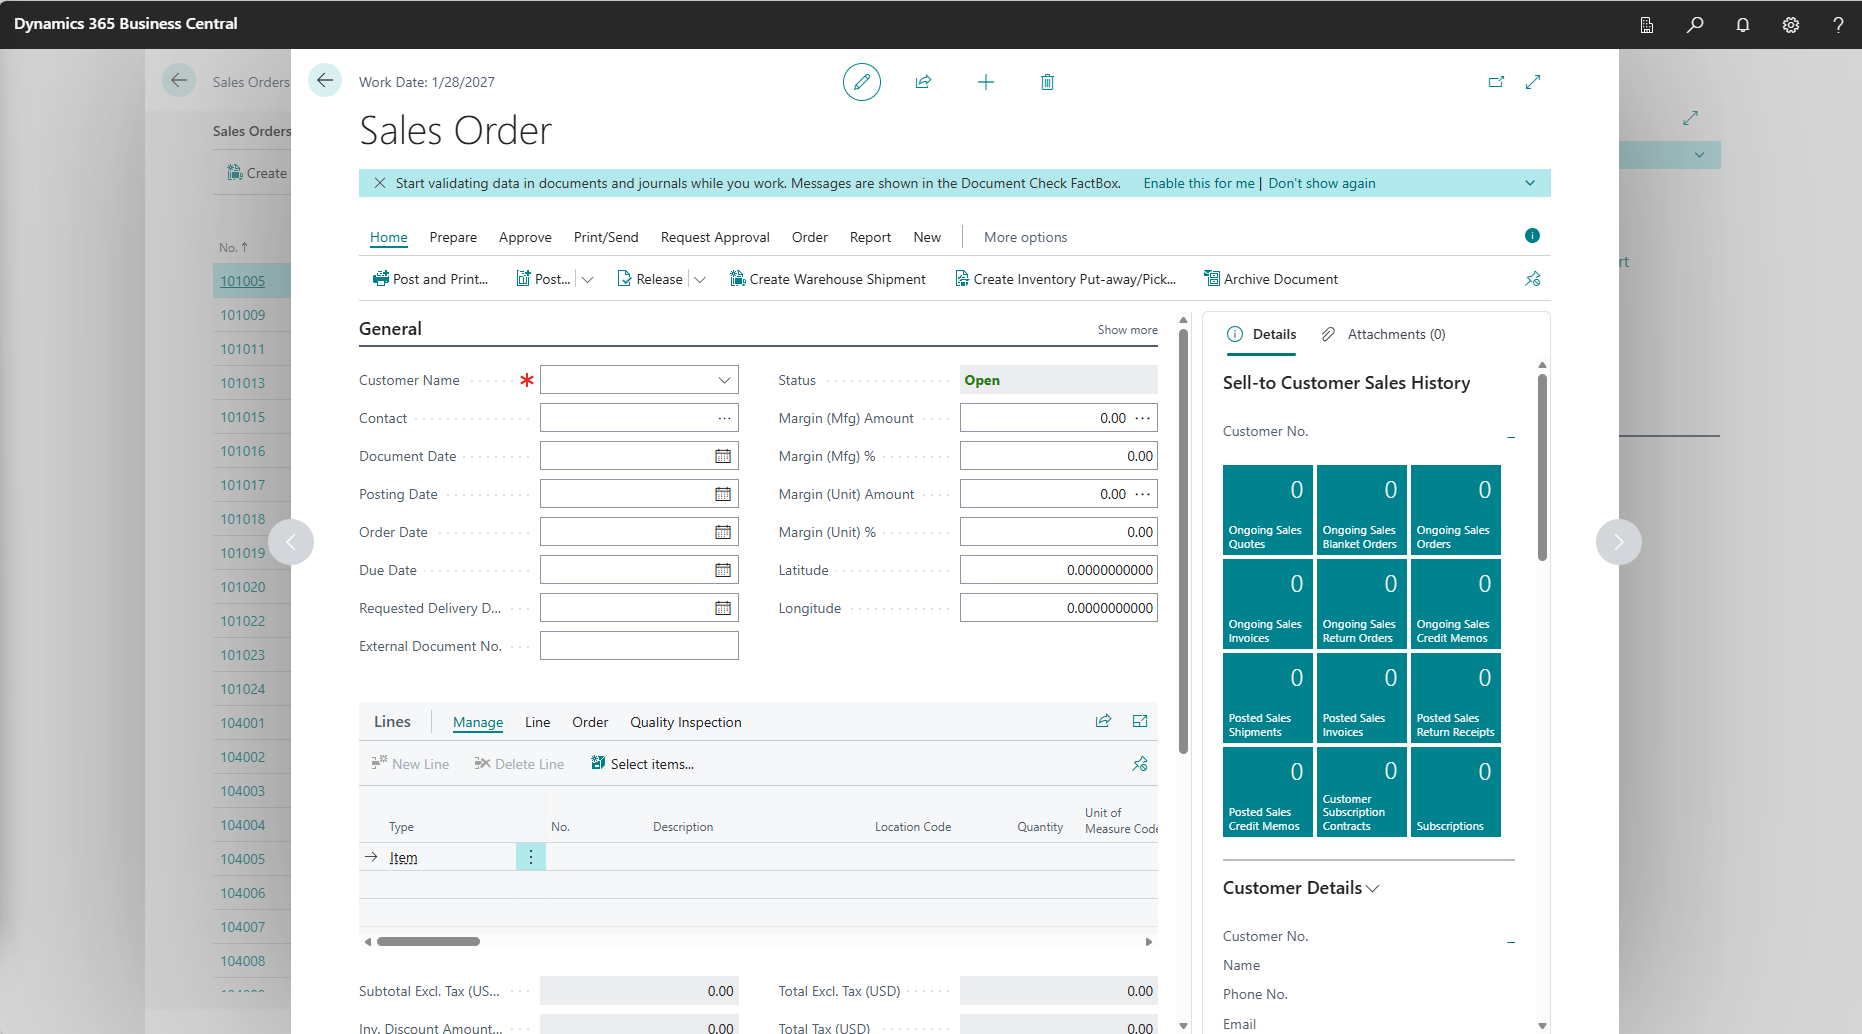
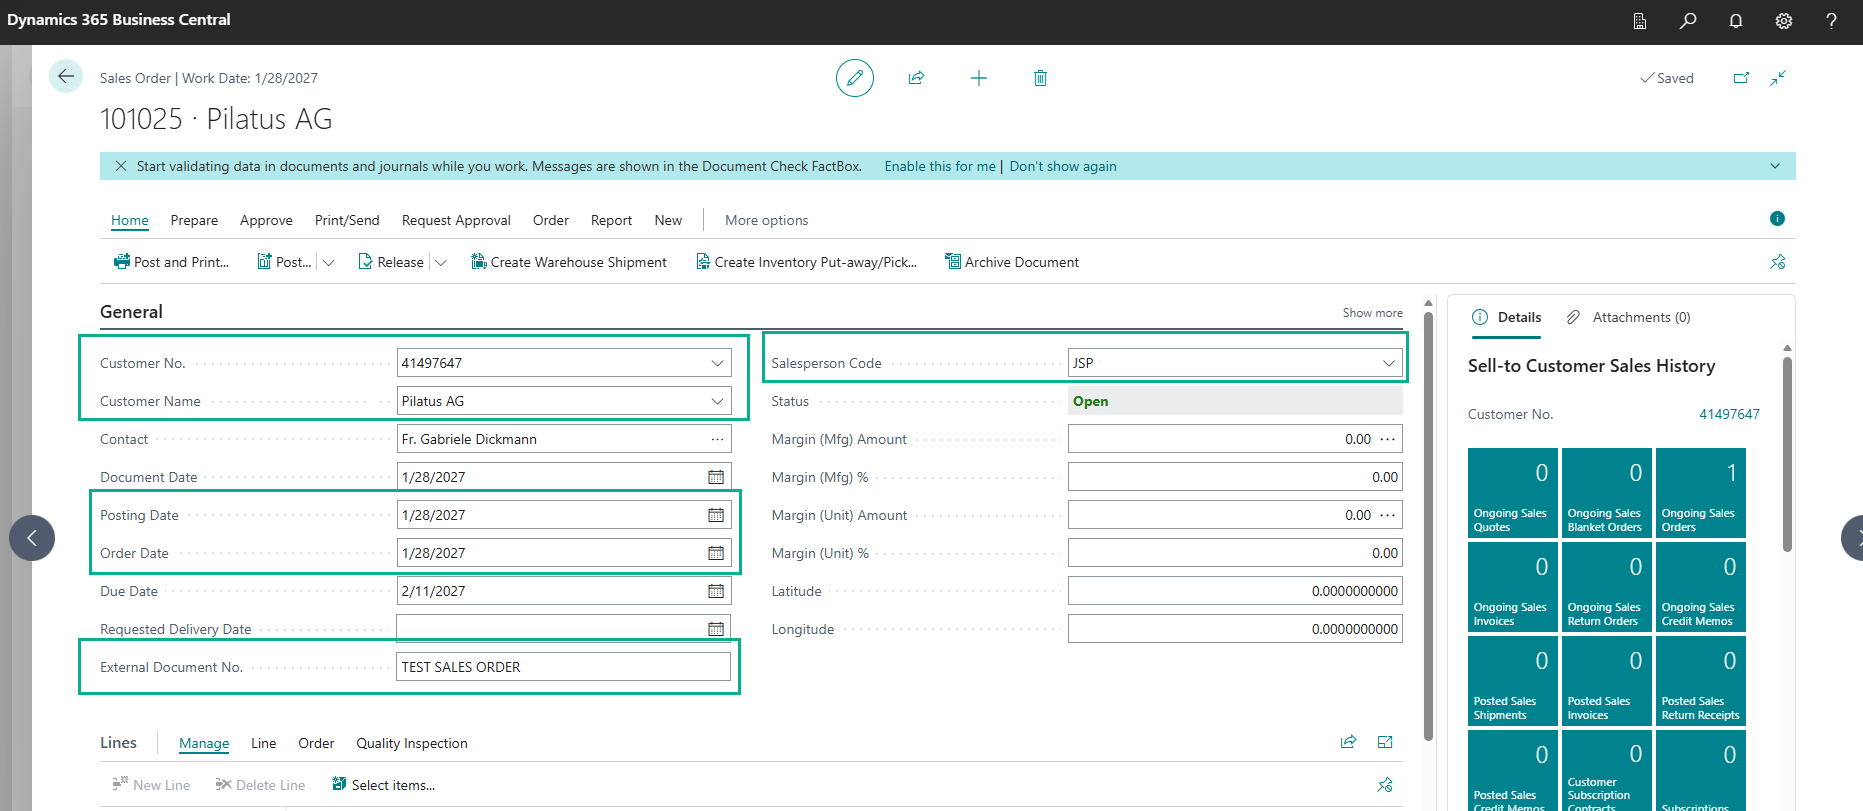
2. Enter the Sales Order Header Information
- In the Header section at the top of the sales order:
- Customer Name
- Select the customer you are selling to.
- Customer details such as bill‑to address, payment terms, and currency will auto‑populate.
- Posting Date
- This is the date the transaction posts to the General Ledger.
- Defaults to today’s date (change if required).
- Order Date
- The date the customer placed the order.
- External Document No.
- Enter the customer’s Purchase Order (PO) number (recommended for traceability).
- Salesperson Code(if applicable)
- Select the salesperson responsible for the order.
- Select the salesperson responsible for the order.
- Customer Name
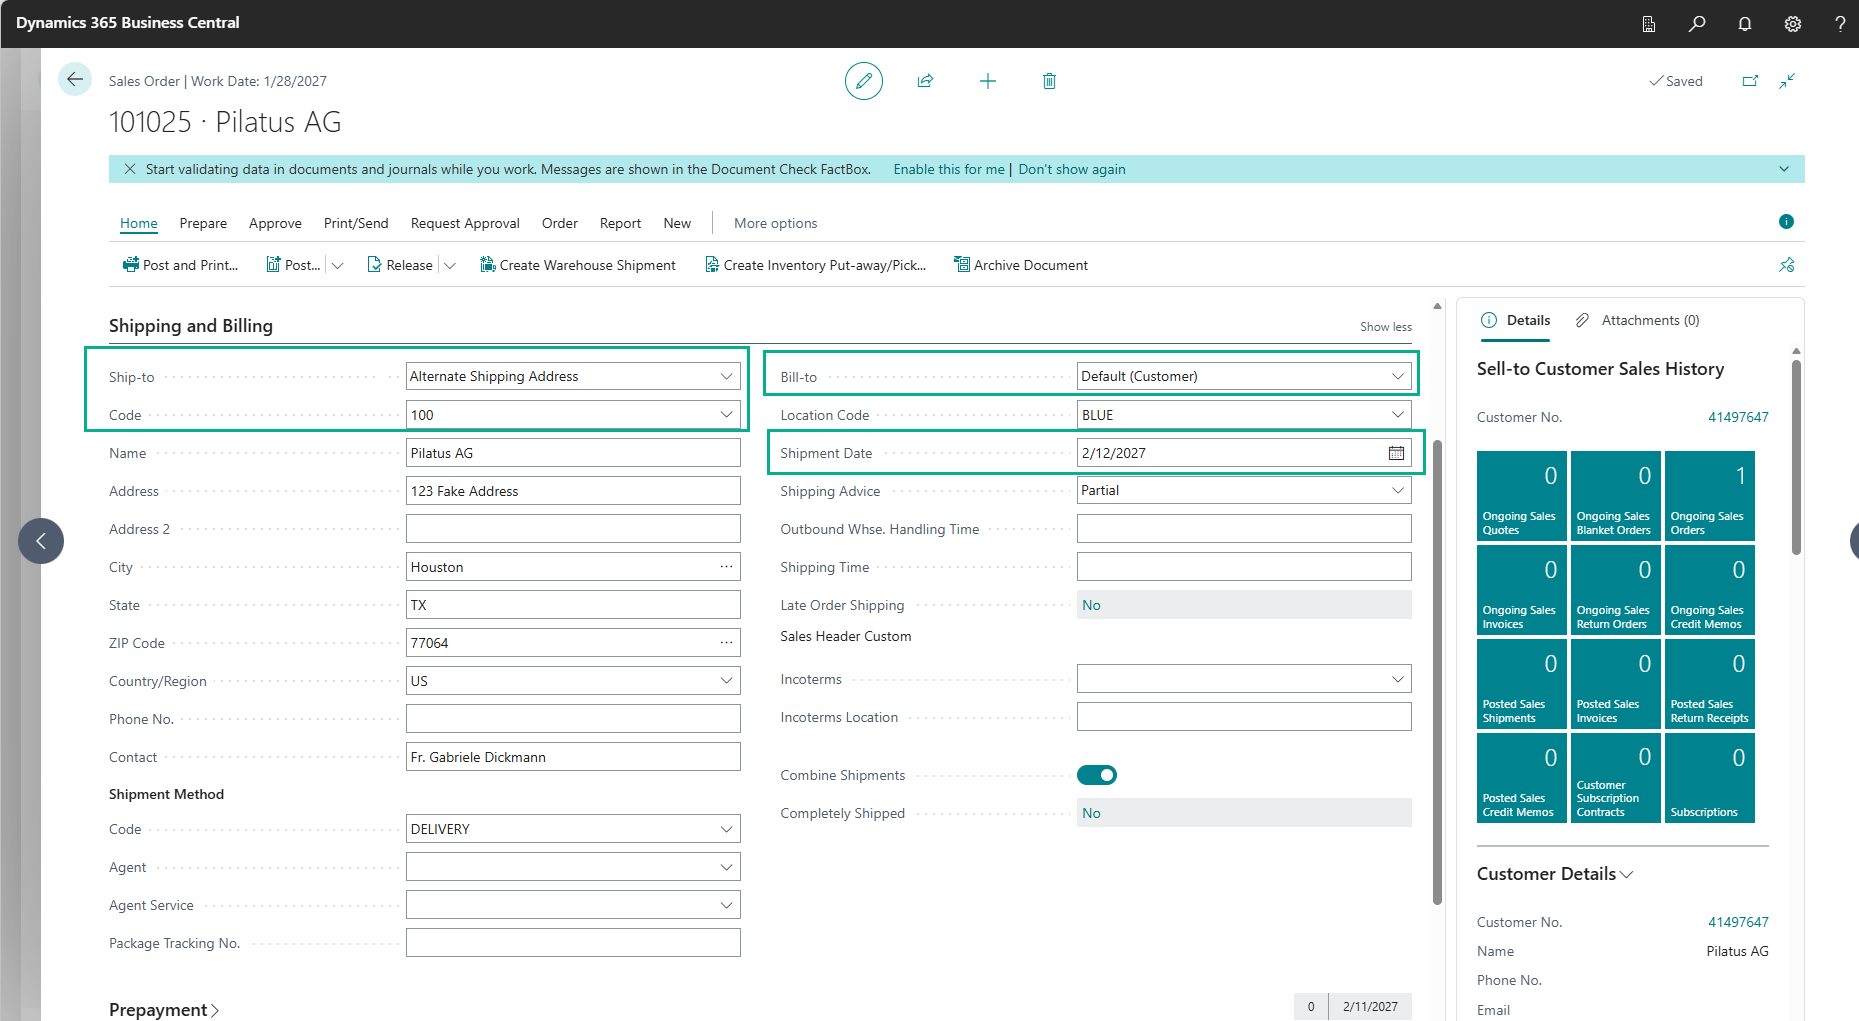
3. Review Shipping and Billing Information
- Confirm Bill‑to Customer and Ship‑to Address.
- Update the ship‑to address if delivering to a different location.
- Verify Shipment Date if required for scheduling and availability.
4. Add Sales Lines (Items or Services)
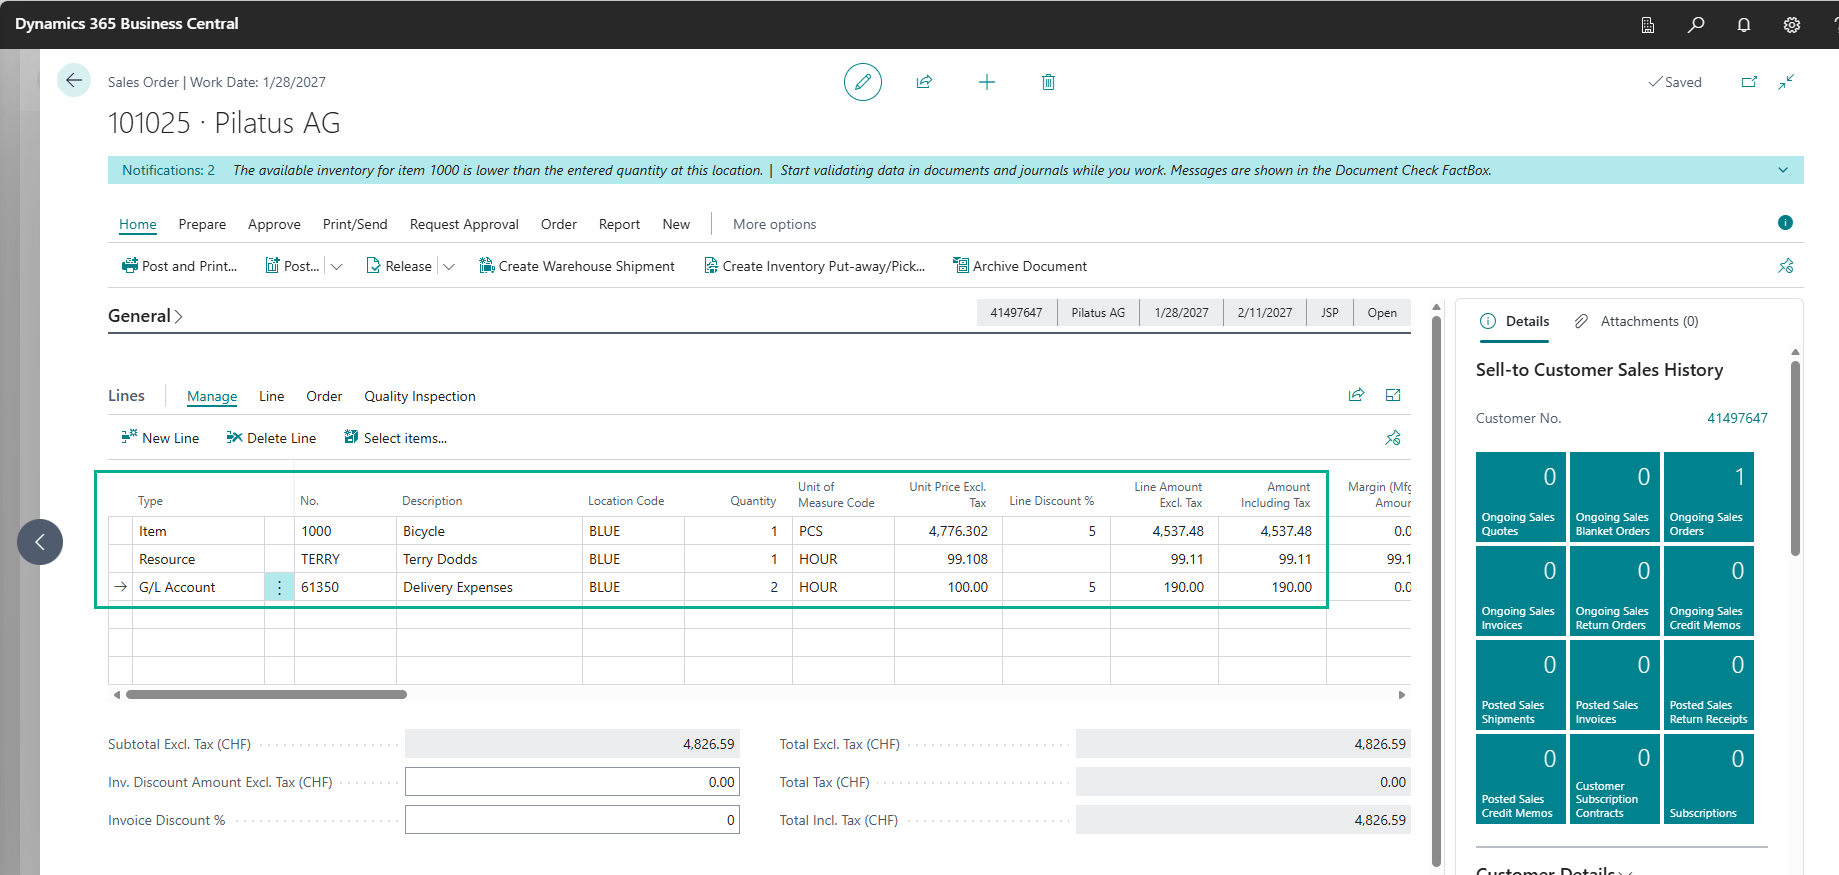
- In the Lines section:
- Type
- Select one of the following:
- Item – physical inventory
- Resource – labor or time
- G/L Account – non‑inventory charges (freight, misc. fees)
- Select one of the following:
- No.
- Select the item, resource, or G/L account.
- Select the item, resource, or G/L account.
- Description
- Automatically fills in but can be edited if needed.
- Automatically fills in but can be edited if needed.
- Quantity
- Enter the quantity being sold.
- Enter the quantity being sold.
- Unit Price
- Defaults from the item or customer pricing setup.
- Adjust if necessary (if you have permission).
- Defaults from the item or customer pricing setup.
- Line Discount %(optional)
- Enter any applicable discount.
- Enter any applicable discount.
- Type
Repeat these steps for each line on the order.
5. Check Inventory Availability (Items Only)
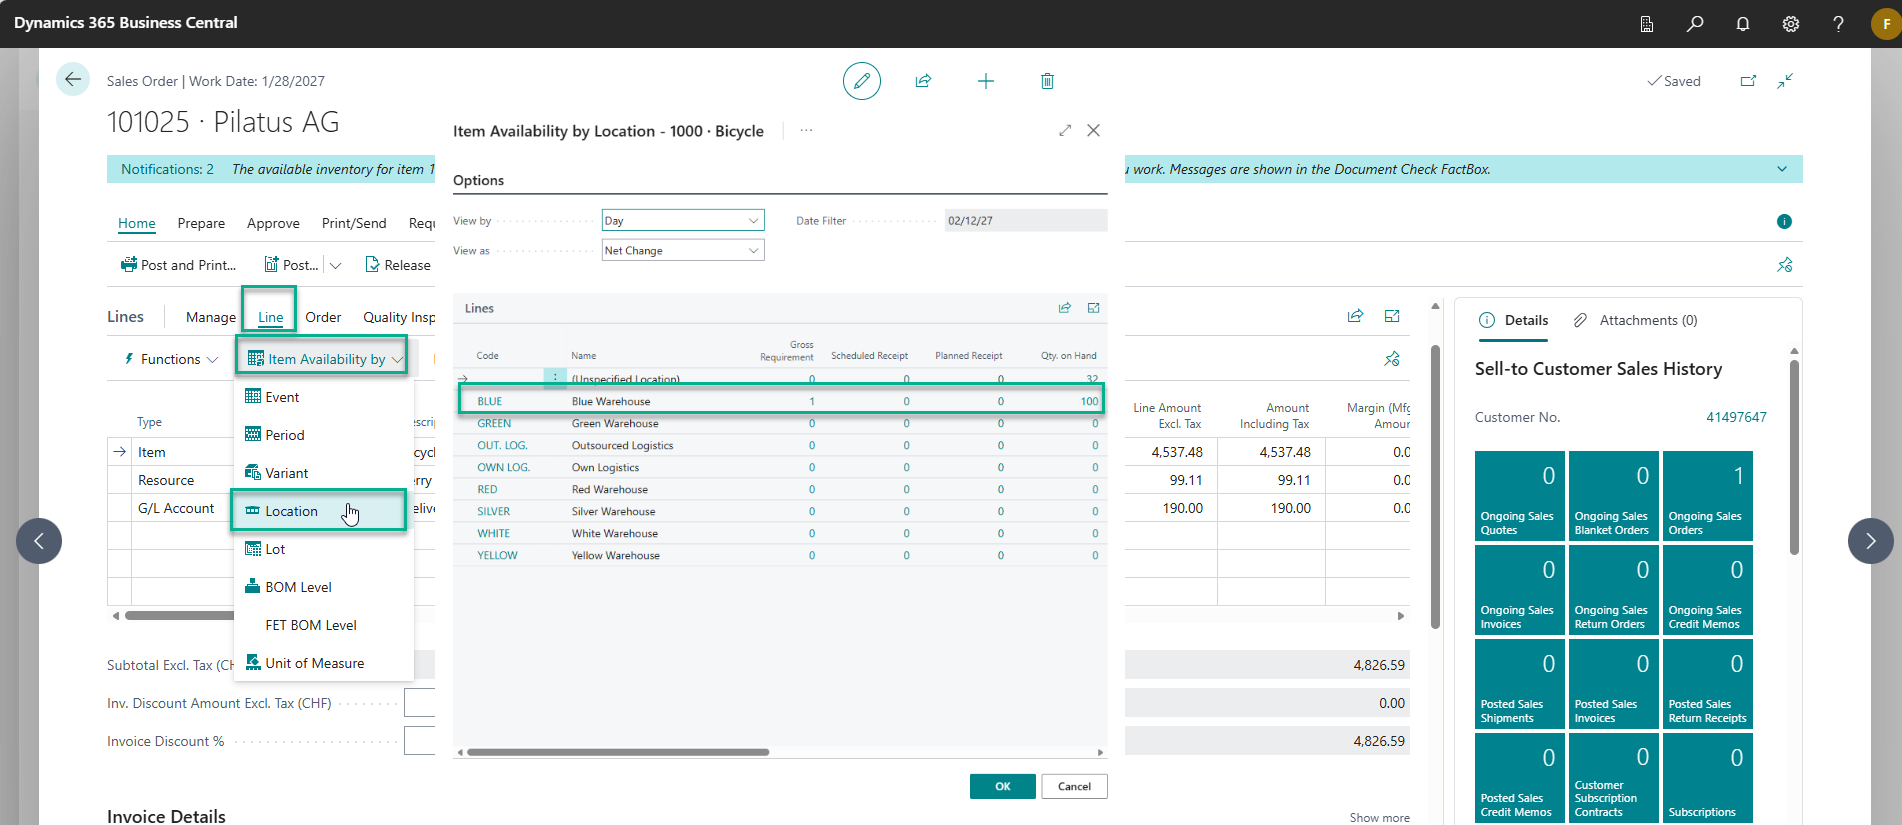
- For item lines:
- Select the line.
- Click Line > Item Availability to verify stock levels.
- Confirm sufficient inventory is available to ship.
6. Attach Supporting Documents (Optional but Recommended)
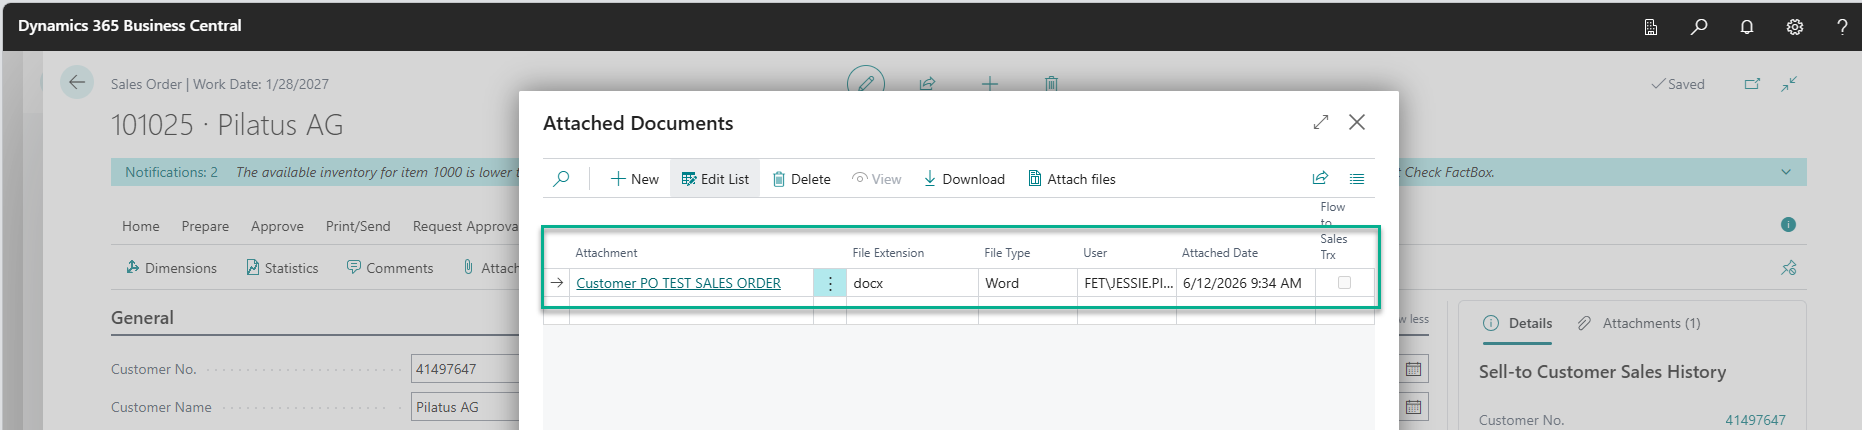
- Go to Order > Attachments.
- Attach:
- Customer purchase order
- Quote or agreement
- Any supporting documentation
- Customer purchase order
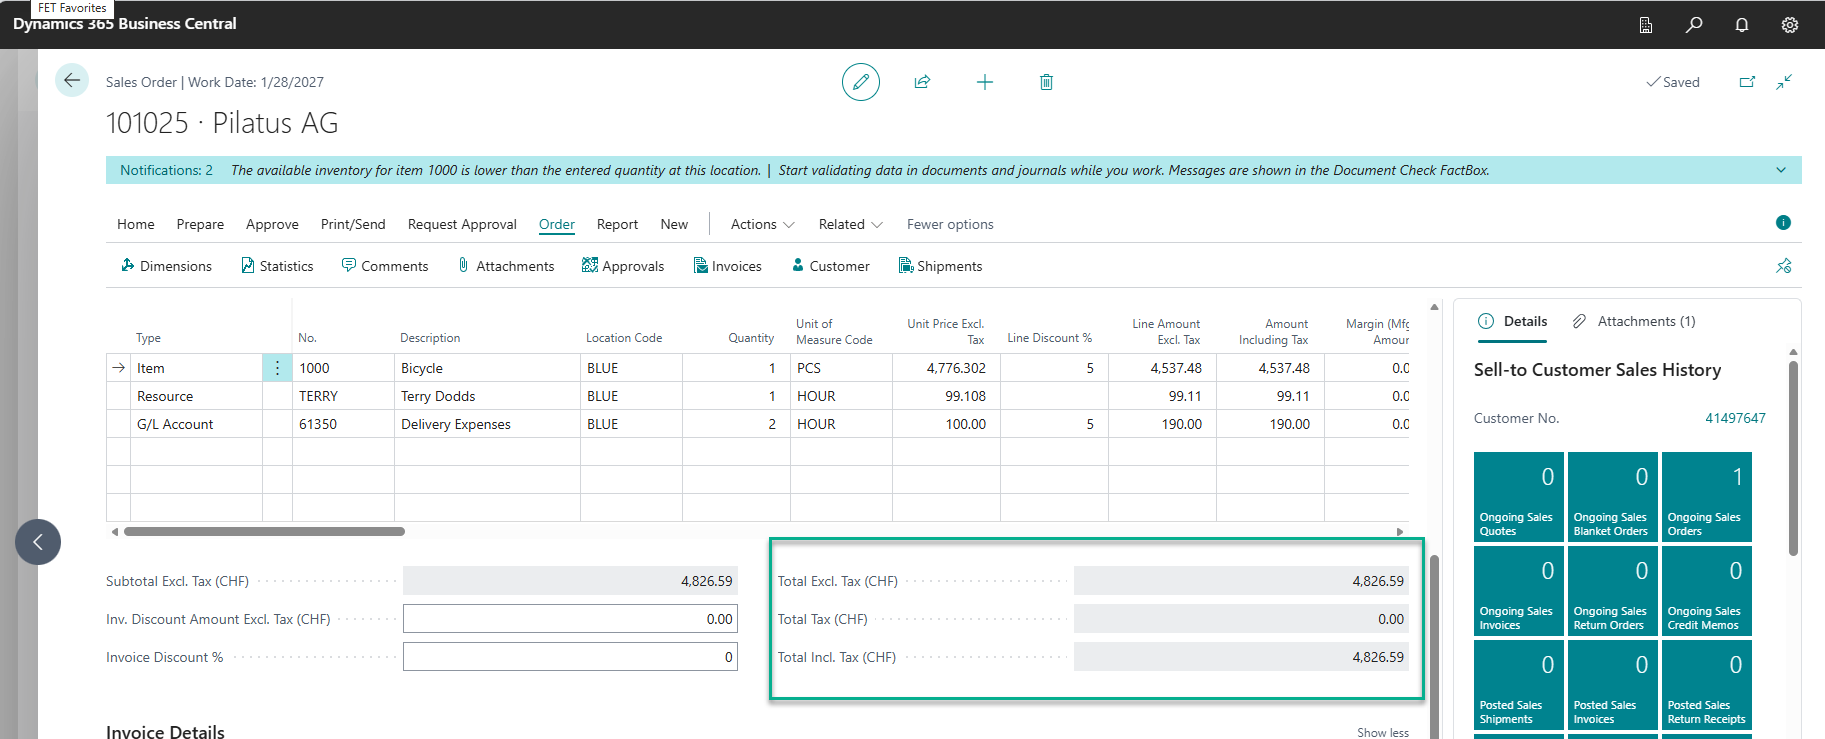
7. Review Totals and Taxes
- Review the Subtotal, Tax Amount, and Total Amount.
- Ensure tax and pricing are correct before proceeding.
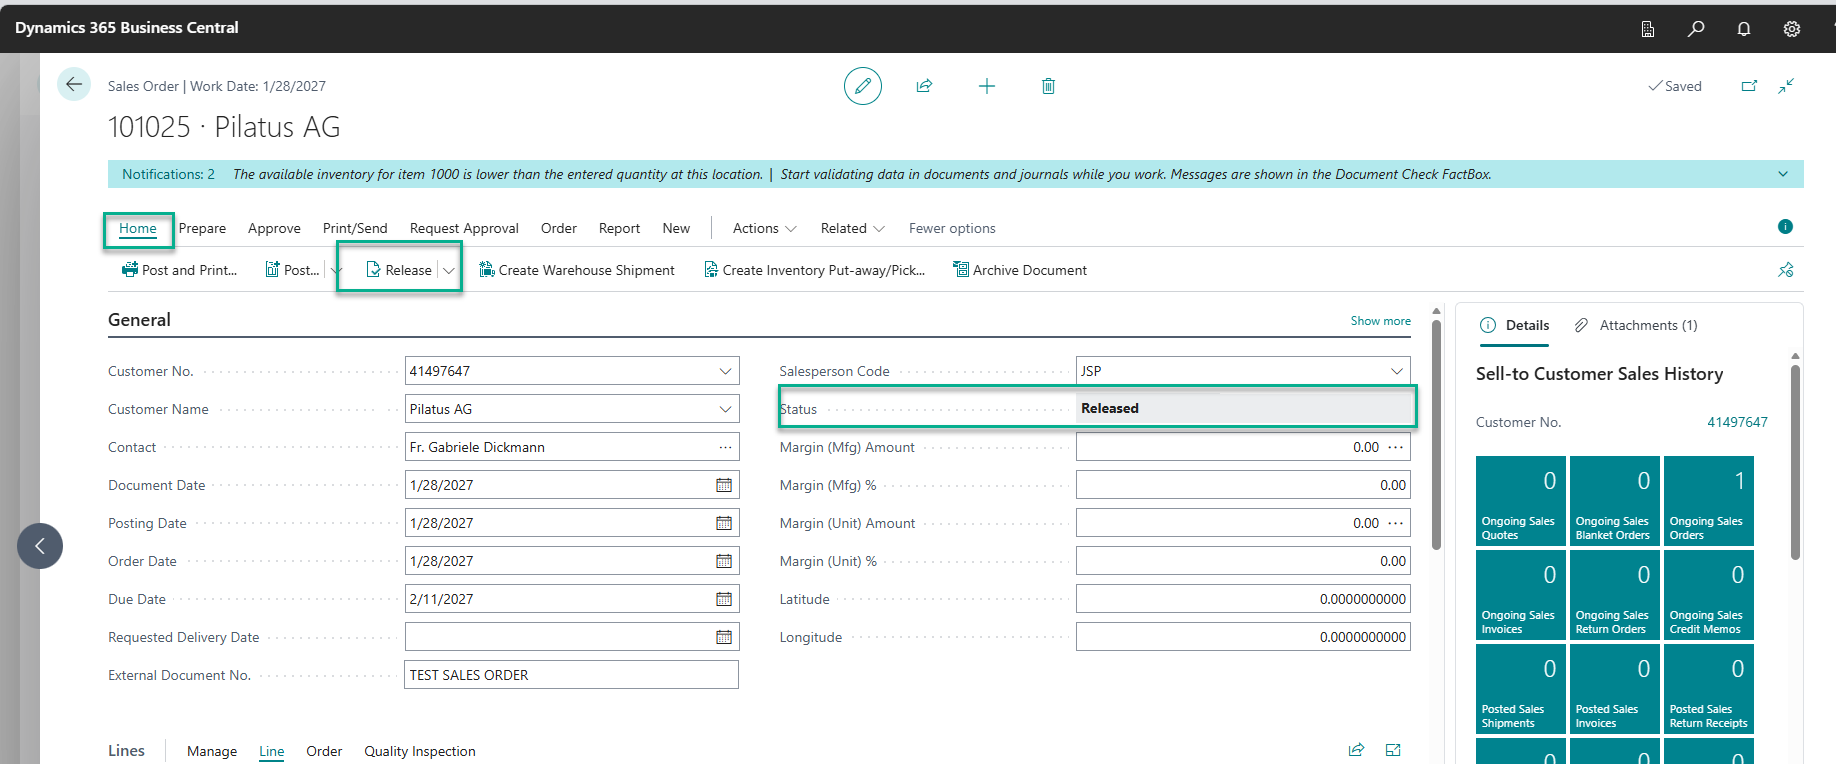
8. Release the Sales Order
- Click Release.
- Status changes from Open to Released.
- Released orders are ready for warehouse processing, shipping, and invoicing.
- Released orders are ready for warehouse processing, shipping, and invoicing.